

In the realm of industrial operations, the proper maintenance of valves is crucial for ensuring the seamless flow of processes. Among the various types of valves, the Flanged Gate Valve stands out as a popular choice due to its reliability and efficiency. However, like any mechanical component, the packing of a flanged gate valve may need to be replaced over time to prevent leaks and ensure optimal performance. As a trusted Flanged Gate Valve supplier, I am here to guide you through the process of replacing the packing of a flanged gate valve.
Understanding the Role of Packing in a Flanged Gate Valve
Before delving into the replacement process, it's essential to understand the function of packing in a flanged gate valve. The packing serves as a seal between the valve stem and the valve bonnet, preventing the leakage of fluids or gases from the valve. Over time, the packing can wear out due to factors such as friction, temperature changes, and chemical exposure. When this happens, it's necessary to replace the packing to maintain the integrity of the valve.
Tools and Materials Required
To replace the packing of a flanged gate valve, you will need the following tools and materials:
- Safety equipment: Safety glasses, gloves, and suitable protective clothing.
- Wrenches: Depending on the size of the valve, you may need adjustable wrenches, box wrenches, or socket wrenches.
- Packing removal tool: This can be a simple flat - head screwdriver or a specialized packing removal tool.
- New packing material: Ensure that the packing material is compatible with the fluid or gas flowing through the valve and the operating conditions.
- Grease: A suitable valve grease to lubricate the new packing.
Step - by - Step Guide to Replacing the Packing
Step 1: Isolate the Valve
Before starting any work on the valve, it is imperative to isolate it from the system. This involves closing the upstream and downstream valves to stop the flow of fluid or gas. Additionally, relieve any pressure in the valve by opening the drain valve or bleeder valve, if available. Make sure to follow all safety protocols and procedures during this step.
Step 2: Remove the Packing Gland Bolts
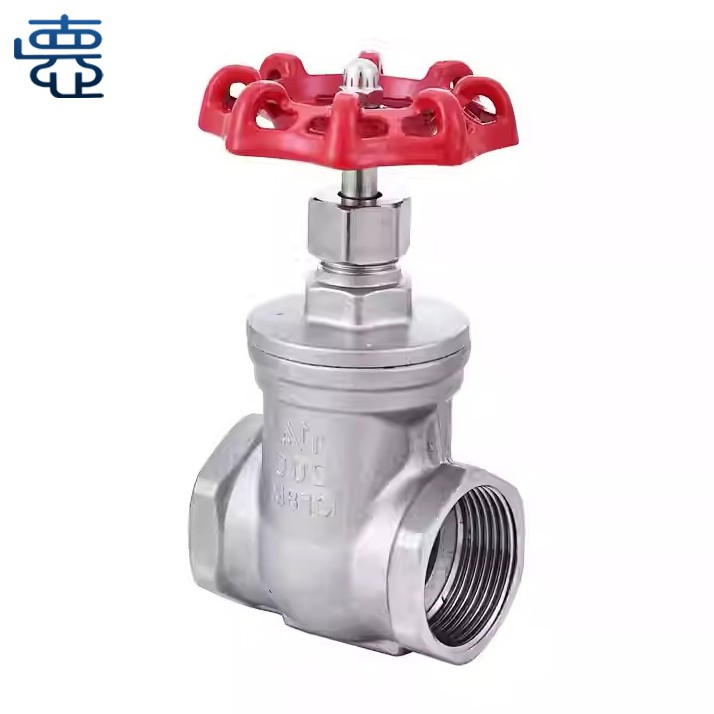
Locate the packing gland, which is usually a round or square nut - like component on top of the valve bonnet. Use the appropriate wrench to loosen and remove the packing gland bolts. Keep the bolts in a safe place to prevent loss.

Step 3: Remove the Old Packing
Once the packing gland bolts are removed, gently lift the packing gland out of the valve. Use the packing removal tool to carefully extract the old packing from the packing cavity. Remove all traces of the old packing, ensuring that the cavity is clean. You may need to use a brush or solvent to clean the cavity thoroughly.
Step 4: Inspect the Valve Stem and Packing Cavity
While the old packing is removed, take the opportunity to inspect the valve stem and the packing cavity for any signs of wear, damage, or corrosion. If the valve stem is damaged, it may need to be repaired or replaced before installing the new packing. Likewise, if the packing cavity is corroded or damaged, it may need to be machined or the valve may need to be replaced.
Step 5: Install the New Packing
Cut the new packing material into appropriate lengths. The length of each packing ring should be such that it fits snugly around the valve stem without overlapping. Apply a thin layer of grease to each packing ring to facilitate installation and reduce friction.
Start by inserting the first packing ring into the packing cavity. Make sure the ring is seated evenly around the valve stem. Use a packing tool or a flat - head screwdriver to gently press the ring into place. Repeat this process for each subsequent packing ring, stacking them one on top of the other in the packing cavity.
Step 6: Reinstall the Packing Gland
Once all the new packing rings are installed, carefully place the packing gland back on top of the packing. Align the holes in the packing gland with the holes in the valve bonnet. Insert the packing gland bolts and tighten them evenly, alternating between bolts to ensure uniform compression of the packing. Do not over - tighten the bolts, as this can damage the packing and cause excessive friction on the valve stem.
Step 7: Test the Valve
After reinstalling the packing gland, slowly open the upstream valve to gradually introduce pressure into the valve. Check for any signs of leakage around the packing gland. If there are no leaks, fully open and close the valve several times to ensure smooth operation.
Tips for Successful Packing Replacement
- Choose the Right Packing Material: Select a packing material that is compatible with the fluid or gas being handled, as well as the operating temperature, pressure, and chemical environment. Different packing materials, such as graphite, PTFE, or asbestos - free materials, have different properties and are suitable for different applications.
- Proper Installation: Ensure that the packing rings are installed correctly, with each ring seated evenly around the valve stem. Avoid twisting or overlapping the packing rings, as this can lead to uneven compression and leakage.
- Regular Maintenance: Even after replacing the packing, it's important to perform regular maintenance on the valve. This includes checking for leaks, lubricating the valve stem, and inspecting the packing for signs of wear.
Other Types of Gate Valves
In addition to Flanged Gate Valves, there are other types of gate valves available, such as Butt - weld Gate Valves and Threaded Gate Valves. Each type has its own advantages and is suitable for different applications. Butt - weld gate valves offer a strong and leak - tight connection, making them ideal for high - pressure and high - temperature applications. Threaded gate valves, on the other hand, are easy to install and are commonly used in low - pressure systems.
Conclusion
Replacing the packing of a flanged gate valve is a relatively straightforward process that can significantly extend the life of the valve and prevent costly leaks. By following the steps outlined in this guide and using the right tools and materials, you can ensure a successful packing replacement.
As a leading Flanged Gate Valve supplier, we are committed to providing high - quality valves and excellent customer service. If you have any questions about valve maintenance, packing replacement, or if you are interested in purchasing our Flanged Gate Valves, Butt - weld Gate Valves, or Threaded Gate Valves, please feel free to contact us for further discussion and procurement negotiation.
References
- "Valve Handbook", by Valve Manufacturers Association
- "Industrial Valves: Selection, Installation, and Maintenance", by various industry experts